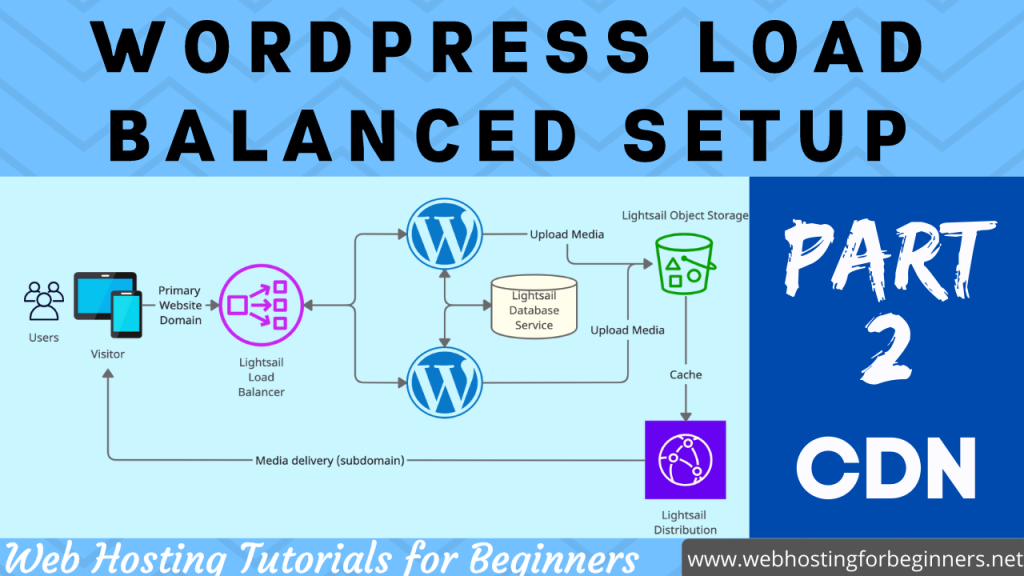
This is part 2 of setting up a complete load balanced WordPress website on the Amazon LightSail platform. This tutorials shows how to add CDN service to a fully load balanced WordPress website architecture. Check out Part 1 of this setup to get the full picture.
Steps:
- Create a Distribution
- Choose the bucket / object storage as origin
- Choose distribution plan specific for your needs
- Create SSL Certificate
- Choose a subdomain for connecting to CloudFront (CDN).
- Validate domain with CNAME record at your DNS Management
- Enable Custom Domains on the distribution and select the new certificate
- Point your subdomain to the distribution URL in DNS Management
- Log into WP Admin
- Navigate to General->Offload Media Lite
- Scroll to Delivery section Click on Change
- Select Amazon CloudFront
- Turn on Custom Domain
- Add you subdomain and hit Save
- Test out by showing the sample media file
- Add media file to a Test Page and check Inspector -> Network -> Response Headers for attribute x-cache: with value of “Hit from Cloudfront”
Links for reference:
Content delivery network distributions in Amazon Lightsail | Lightsail Documentation
Part 1: Tutorial: Setup Load Balanced WordPress website with Lightsail Object Storage
Video:
All videos tutorials on the website as well as the YouTube channel aim to provide a simplified process for a specific scenario; there could be many different factors and unique use cases you may have. The tutorials may not cover every situation; so treat is as a starting point or learning concept to apply to your unique situations, and consider this inspiration but not prescription or explicit direction.