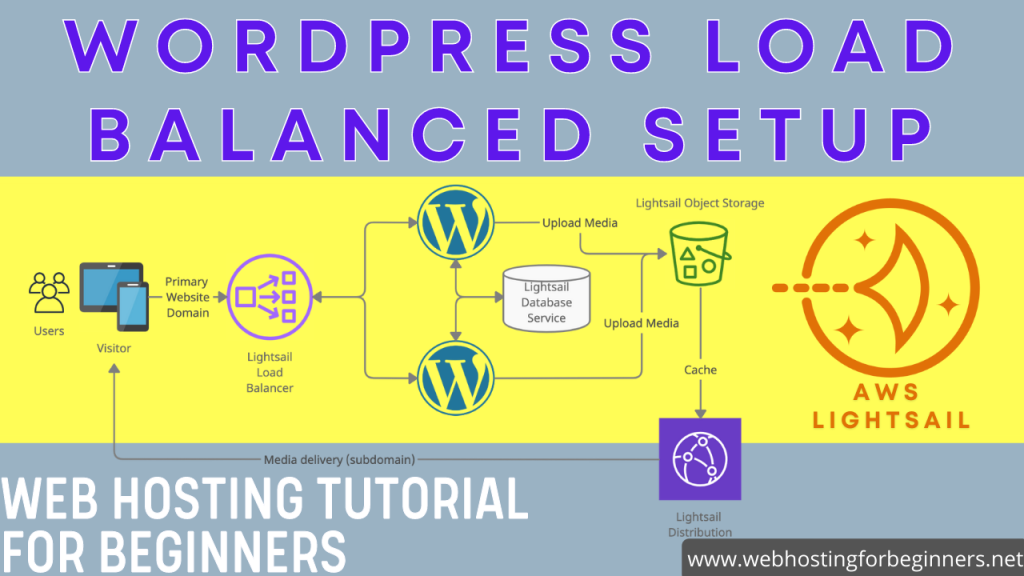
In this final and 3rd episode of setting up a Load Balanced WordPress site on AWS Lightsail, I will show you how to setup a Load Balancer in AWS, configure the DNS to point your custom Domain to it, create and setup a Lightsail Free SSL Certificate and fix an issue with the Bitnami WordPress application.
Episode 1, setup WordPress with S3 Bucket
Episode 2: setup WordPress with AWS Lightsail Database
For Bitnami WordPress, fix a wp-config issue to host on HTTPS: In the wp-config.php file, modify the following lines to set the WP_SITEURL and WP_HOME to https:
define('WP_SITEURL', 'https://' . $_SERVER['HTTP_HOST'] . '/');
define('WP_HOME', 'https://' . $_SERVER['HTTP_HOST'] . '/');
and right above these lines a added the following:
if (strpos($_SERVER['HTTP_X_FORWARDED_PROTO'], 'https') !== false)
    $_SERVER['HTTPS']='on';
That’s it, you should have a fully load balanced WordPress site running on HTTPS SSL Certificate by AWS.
All videos tutorials on the website as well as the YouTube channel aim to provide a simplified process for a specific scenario; there could be many different factors and unique use cases you may have. The tutorials may not cover every situation; so treat is as a starting point or learning concept to apply to your unique situations, and consider this inspiration but not prescription or explicit direction.