In this video I walk-through the options for updating plugins, themes and even WordPress core if you have a Load Balanced Multi-Instance WordPress website.
In past videos linked below, I walk through the process of setting up a Load Balanced high availability WordPress website. This video builds upon those tutorials with ability update all instances with plugins, or themes.
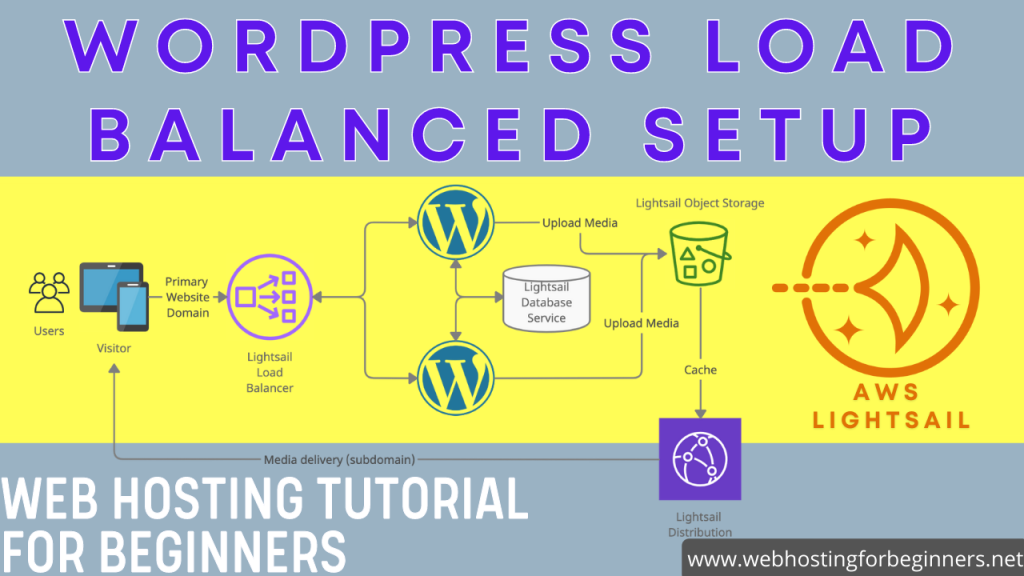
Here is a diagram that illustrates a typical multi-instance or Clustered WordPress setup. As you will see it has a Load Balancer in front of two WordPress Lightsail instances. Each WordPress instance has the normal WordPress files and folders. This includes the wp-content folder which holds the plugins/themes files and folders for your website. The uploads folder is setup with AWS S3 bucket so that any uploaded media files are synchronized to a common folder on Amazon S3. Finally the database is moved from the Lightsail server to a common shared Database service like the Lightsail Database or Amazon Aurora RDS service.
- Setup Load Balanced WordPress Environment Ep 1
- Setup Load Balanced WordPress Environment Ep 2
- Setup Load Balanced WordPress Environment Ep 3
The video below walks through two options of updating the Plugins and Themes.
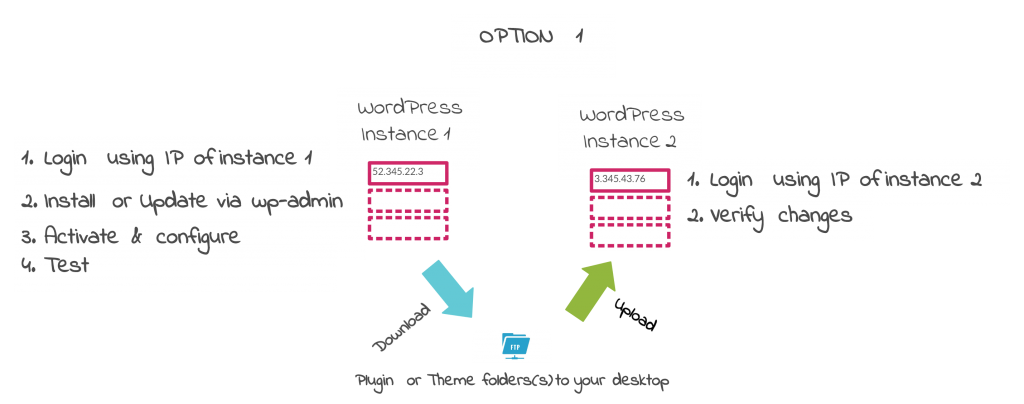
Option 1 – Update plugins and themes on one instances (File + Database) and update other instances with file/folder only changes.
This option will be the simplest.
- Get the IP of one of your WordPress servers from Lightsail Console
- Login to the wp-admin of that instance.
- Update Plugins/Themes, or Add Plugins
- Activate and configure.
- On the second instance, FTP into the Server and upload the same plugin or theme updates you made to the 1st instance.
- Login to the second instance via Wp-admin and verify your plugin updates are there.
- You may want to just click on the Plugins menu.
This involves making your updates to one of your WordPress instances by directly logging into the instance with the IP Address. Once the updates are done, then you would download the plugins and themes folders using FTP to your local computer. Then FTP those plugins and themes folders to the other WordPress instances overriding the plugins and themes. You can then verify both instances consist of the same plugins and folders. Since the updates on the first instances was done the common database already has those updates.
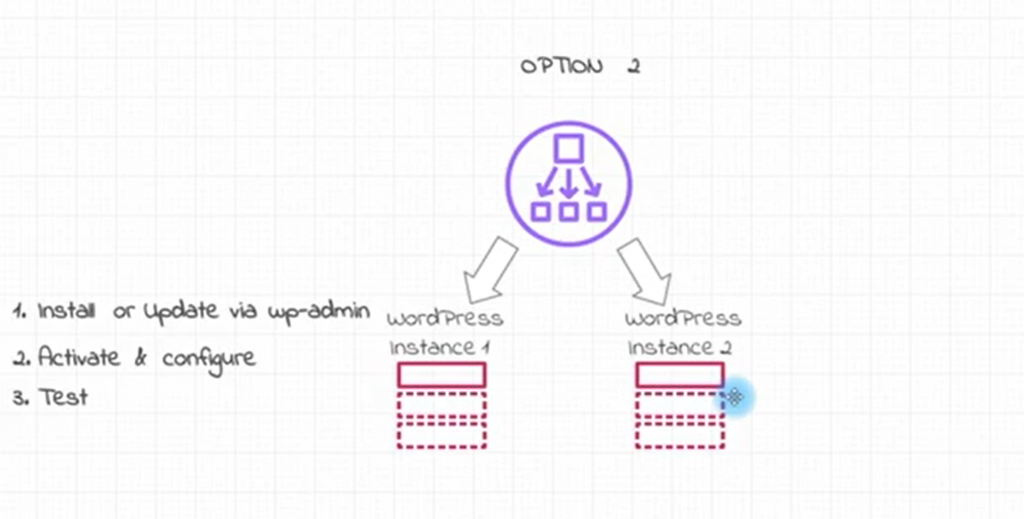
Option 2 (preferred) – Remove all instances from the Load Balancer except one, update File + database using your domain (not IP), replicate and then re-attach to LB
- Goto Lightsail console
- Goto Networking
- Goto the Load Balancer
- Detach 2nd instance.
- Login to wp-admin of your site.
- Update/Add Plugins Themes
- Take a snapshot
- Create another instance using snapshot
- Attach to LB
- Delete other instance.
This involves updating one of the WordPress instances (removing others from the LB), creating a snapshot and then spawning new instances from the Snapshot. Then attaching all the new instances to the LB and removing the old instances.
All videos tutorials on the website as well as the YouTube channel aim to provide a simplified process for a specific scenario; there could be many different factors and unique use cases you may have. The tutorials may not cover every situation; so treat is as a starting point or learning concept to apply to your unique situations, and consider this inspiration but not prescription or explicit direction.